
Introduction & Inspiration
This St. Patrick’s Day Cake is a vibrant and festive showstopper, designed to be the centerpiece of any celebration. I’ve always loved creating themed desserts, and St. Patrick’s Day offers so many fun and colorful possibilities. I love a colorful cake.
The inspiration for this cake came from the classic image of a leprechaun’s hat, complete with a rainbow surprise inside. I wanted to create a cake that was both visually stunning and incredibly delicious.
I envisioned a towering, multi-layered cake with a hidden rainbow core filled with Lucky Charms marshmallows. The exterior would be decorated to resemble a leprechaun’s top hat, complete with a black belt and a yellow buckle.
This recipe is the result of careful planning and a desire to create a truly memorable dessert. It’s a cake that’s sure to impress, and I’m excited to share it.
Nostalgic Appeal
St. Patrick’s Day, with its vibrant green colors, shamrocks, and leprechauns, holds a special place in many hearts. It’s a holiday that’s often associated with fun, festivities, and a touch of magic. I love the magic.
Rainbows, too, are inherently joyful and nostalgic. They evoke feelings of wonder, hope, and childhood dreams. They are so pretty.
Lucky Charms cereal, with its colorful marshmallows, is a beloved breakfast treat for many. It’s a taste of childhood that brings back happy memories.
This St. Patrick’s Day Cake taps into those nostalgic elements, creating a dessert that’s both festive and comforting. It’s a celebration of all things fun and colorful.
Homemade Focus
This recipe is a testament to the power of homemade baking. Every element, from the multi-colored cake layers to the buttercream frosting and the decorative details, is made from scratch, using fresh, high-quality ingredients.
The process of making this cake is a bit involved, but it’s also incredibly rewarding. It’s about taking the time to create something truly special, layer by layer. I love creating.
Each step, from whisking the dry ingredients to dyeing the batter, to frosting and decorating the cake, adds to the overall experience. It’s a labor of love.
This recipe is a reminder that homemade desserts are always worth the effort. The flavor, texture, and satisfaction of creating something from scratch are simply unmatched.
Flavor Goal
The primary objective of this recipe is to create a cake that’s not only visually stunning but also delicious, with a moist, tender crumb and a perfectly balanced sweetness. The right balance.
The cake itself is a classic vanilla cake, providing a versatile base that allows the rainbow colors and the Lucky Charms marshmallows to shine.
The buttercream frosting is smooth, creamy, and not overly sweet, complementing the cake without overpowering it.
The Lucky Charms marshmallows add a fun, unexpected element and a touch of sweetness and texture to the center of the cake. It’s a surprise.
Ultimately, I wanted a cake that was both impressive and enjoyable to eat, a dessert that would be the highlight of any St. Patrick’s Day celebration.
Ingredient Insights
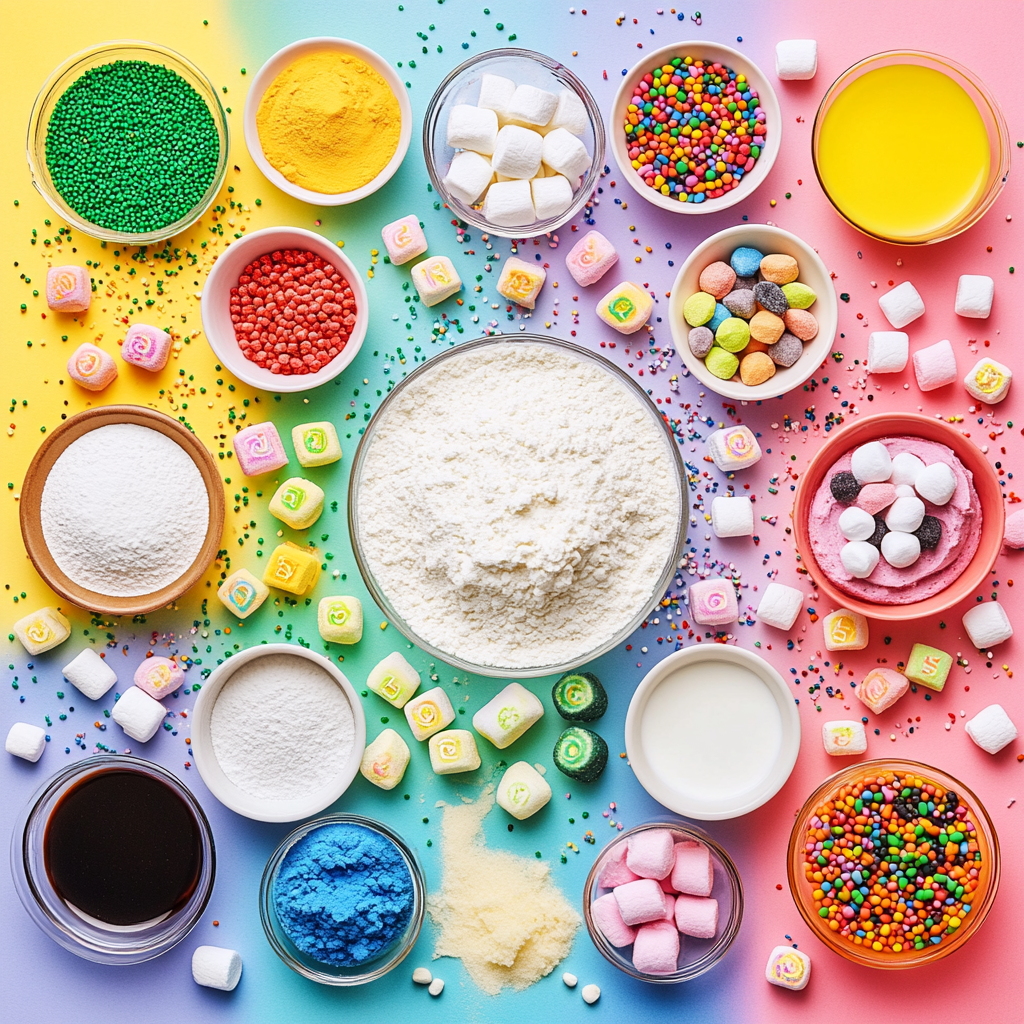
Let’s explore the ingredients that make this St. Patrick’s Day Cake so special:
All-Purpose Flour: This provides the structure for the cake layers.
Baking Powder: This is the leavening agent, helping the cake layers to rise and become light and fluffy.
Kosher Salt: A pinch of salt enhances the other flavors and balances the sweetness.
Granulated Sugar: This provides sweetness to the cake.
Unsalted Butter (Softened): This adds richness, flavor, and tenderness to both the cake and the frosting.
Vegetable Oil: This adds moisture to the cake, helping to create a tender crumb.
Large Eggs: These bind the ingredients together and contribute to the cake’s structure and richness.
Pure Vanilla Extract: Vanilla enhances the overall flavor of both the cake and the frosting.
Whole Milk: This adds moisture to the cake.
Sour Cream: This adds moisture and a subtle tanginess to the cake, creating a tender and flavorful crumb.
Food Coloring (Red, Orange, Yellow, Green, Blue, Purple, Black): These are used to create the vibrant rainbow layers of the cake and to color the frosting for decoration. Gel food coloring is recommended for the most intense colors.
Powdered Sugar: This is the base of the buttercream frosting, providing sweetness and a smooth texture.
Heavy Cream: This adds richness and creaminess to the frosting.
Lucky Charms Marshmallows: These are used as a fun and festive filling for the center of the cake.
Essential Equipment
You’ll need a few specific tools for this ambitious cake:
1 (8-inch) Cake Pan and 5 (6-inch) Cake Pans: These are for baking the different colored cake layers.
Parchment Paper: This is for lining the cake pans, preventing the cakes from sticking and making cleanup easier.
Large Bowls (multiple): You’ll need bowls for whisking the dry ingredients, wet ingredients, and for dividing and coloring the batter.
Handheld Mixer (or Stand Mixer): This is essential for beating the butter and sugar, incorporating the eggs, and making the frosting.
Rubber Spatula: This is for folding the ingredients together and scraping down the sides of the bowl.
3-inch Round Cookie Cutter: This is for cutting out the center of the smaller cake layers to create space for the Lucky Charms marshmallows.
Offset Spatula: This is for frosting the cake smoothly and evenly.
Bench Scraper: This is for smoothing the sides of the frosted cake.
Piping Bag with a Medium Round Tip: This is for piping the yellow buttercream buckle on the cake.
List of Ingredients with Measurements
Here’s a precise list of the ingredients, along with their exact measurements:
Cake:
- Cooking spray
- 5 1/2 cups (660 grams) all-purpose flour
- 1 tablespoon baking powder
- 1 teaspoon kosher salt
- 3 cups (600 grams) granulated sugar
- 1 cup (2 sticks) unsalted butter, softened
- 1 cup vegetable oil
- 6 large eggs
- 1 tablespoon pure vanilla extract
- 1 cup whole milk
- 1 cup sour cream
- Red, orange, yellow, green, blue, and purple food coloring, for decorating
Frosting & Assembly:
- 8 cups (920 grams) powdered sugar
- 2 1/2 cups (5 sticks) unsalted butter, softened
- 1/3 cup heavy cream
- 2 teaspoons pure vanilla extract
- 1/4 teaspoon kosher salt
- 1 1/2 cups Lucky Charm marshmallows
- Green, black, and yellow food coloring, for decorating
Step-by-Step Instructions
Let’s build this magnificent St. Patrick’s Day Cake!
Cake:
Step 1: Preheat and Prepare Pans
Preheat your oven to 350°F (175°C). Line one 8-inch cake pan and five 6-inch cake pans with parchment paper rounds. Coat the pans with cooking spray.
Step 2: Combine Dry Ingredients
In a large bowl, whisk together the flour, baking powder, and salt.
Step 3: Cream Butter and Sugar
In another large bowl, using a handheld mixer on medium-high speed (or a stand mixer fitted with the paddle attachment), beat the granulated sugar and softened butter until combined.
Add the oil and beat until the mixture is smooth and creamy.
Step 4: Add Eggs and Vanilla
Add the eggs one at a time, beating well after each addition. Then, beat in the vanilla extract.
Step 5: Alternate Adding Dry Ingredients and Liquids
Add about one-third of the dry ingredients to the wet ingredients and beat on medium-low speed until just a few dry streaks remain.
Add the milk and beat until incorporated.
Add another one-third of the dry ingredients and beat on medium-low speed until just a few dry streaks remain.
Add the sour cream and beat until incorporated.
Add the remaining dry ingredients and beat until just combined. Be careful not to overmix.
Step 6: Divide and Color Batter
Divide the batter evenly among six bowls.
Dye one bowl of batter red, one orange, one yellow, one green, one blue, and one purple, using gel food coloring for the most vibrant colors.
Step 7: Bake the Cakes
Pour the purple batter into the prepared 8-inch cake pan. Bake for 15 to 18 minutes, or until a tester inserted into the center comes out clean. Let cool completely.
Pour the remaining batters (red, orange, yellow, green, blue) into the prepared 6-inch cake pans. Bake for 30 to 35 minutes, or until a tester inserted into the center comes out clean. Let cool completely.
Step 8: Make Ahead (Optional)
Cake layers can be baked 1 day ahead. Wrap them tightly in plastic wrap and refrigerate, or freeze for up to 2 weeks.
Frosting & Assembly:
Step 1: Make the Frosting
In a large bowl, using a handheld mixer on medium speed (or a stand mixer fitted with the paddle attachment), beat the powdered sugar and softened butter until smooth.
Add the heavy cream, vanilla extract, and salt and beat until combined and fluffy.
Step 2: Trim and Cut Cake Layers
Trim the tops of the cooled cake layers as needed to make them level.
Using a 3-inch round cookie cutter, cut out the center of the orange, yellow, green, and blue cake layers. Reserve the cut-out centers for another use (cake pops, perhaps!).
Step 3: Assemble the Cake
Place the purple layer on a cake stand or platter. Frost the top with a thin layer of buttercream.
Top with the blue cake layer. Frost with more buttercream and repeat with the green, yellow, and orange cake layers in that order, frosting the top of the orange layer with buttercream.
Pour the Lucky Charms marshmallows into the center of the cake, filling the hole created by the cookie cutter.
Top with the red cake layer.
Step 4: Crumb Coat
Frost the top and outside of the cake with a thin layer of buttercream to create a crumb coat. This will seal in any loose crumbs and create a smooth surface for the final frosting.
Refrigerate the cake until the crumb coat is well chilled, at least 30 minutes or up to 2 hours.
Step 5: Final Frosting and Decoration
Scoop out about 1 1/2 cups of the buttercream and set aside.
Dye the remaining buttercream green using gel food coloring.
Using an offset spatula, frost the cake with the green buttercream, smoothing the sides with a bench scraper.
Step 6: Create the Hat Details
Divide the reserved buttercream into two portions: about 1 cup and 1/2 cup.
Dye the 1 cup portion black and the 1/2 cup portion yellow.
Using an offset spatula, frost a 1-inch-thick belt with the black frosting at the base of the cake, just above where the “rim” of the hat would be. To help create a smooth line, you can wrap the cake in parchment paper above where you’ll frost, covering the “rim” of the hat with parchment as well.
Transfer the yellow buttercream to a piping bag fitted with a medium round tip. Pipe a buckle over the black belt.

Troubleshooting
Here are some potential issues and their solutions:
Problem: Cake layers are dry.
Solution: You may have overbaked the cakes, or used too much flour. Be sure to measure the flour accurately and check for doneness with a toothpick.
Problem: Cake layers are uneven.
Solution: Make sure your oven is properly calibrated and that you’re distributing the batter evenly among the cake pans. You can also use a kitchen scale to weigh the batter in each pan.
Problem: Frosting is too soft.
Solution: Refrigerate the frosting for a few minutes to firm it up. You can also add a bit more powdered sugar, a tablespoon at a time, until it reaches your desired consistency.
Problem: Frosting is too stiff.
Solution: Add a bit more heavy cream, a teaspoon at a time, until the frosting reaches your desired consistency.
Tips and Variations
Here are some extra tips and variations to customize your St. Patrick’s Day Cake:
Tip: For a more intense vanilla flavor, use vanilla bean paste instead of vanilla extract.
Variation: Add a layer of lemon curd or raspberry jam between the cake layers for extra flavor and moisture.
Variation: Instead of Lucky Charms marshmallows, use other colorful candies, such as Skittles or M&Ms, as the filling.
Tip: If you don’t have a 3-inch cookie cutter, you can use a sharp knife to carefully cut out the center of the cake layers.
Variation: Decorate the cake with additional St. Patrick’s Day-themed decorations, such as shamrocks, gold coins, or rainbow sprinkles.
Variation: Instead of a leprechaun’s hat, decorate the cake with a different St. Patrick’s Day theme, such as a pot of gold at the end of a rainbow.
Serving and Pairing Suggestions
This St. Patrick’s Day Cake is a showstopper that’s perfect for any celebration. Here are some serving ideas:
Serve it as the centerpiece of your St. Patrick’s Day dessert table.
Pair it with a glass of milk, a cup of coffee, or a glass of Irish cream liqueur.
Serve it at a birthday party, a school event, or any gathering where you want to impress your guests.
Offer it as a fun and festive treat for kids and adults alike.
Nutritional Information
Here’s an approximate nutritional estimate per serving (assuming the recipe yields 12-16 servings):
- Calories: 600-700
- Fat: 35-45g
- Sugar: 50-60g
- Protein: 6-8g
It’s a treat.
Enjoy this cake in moderation as part of a balanced diet.
Print
St. Patrick’s Day Cake
Description
This St. Patrick’s Day Cake is a vibrant and festive showstopper, designed to be the centerpiece of any celebration
Ingredients
Cake:
- Cooking spray
- 5 1/2 cups (660 grams) all-purpose flour
- 1 tablespoon baking powder
- 1 teaspoon kosher salt
- 3 cups (600 grams) granulated sugar
- 1 cup (2 sticks) unsalted butter, softened
- 1 cup vegetable oil
- 6 large eggs
- 1 tablespoon pure vanilla extract
- 1 cup whole milk
- 1 cup sour cream
- Red, orange, yellow, green, blue, and purple food coloring, for decorating
Frosting & Assembly:
- 8 cups (920 grams) powdered sugar
- 2 1/2 cups (5 sticks) unsalted butter, softened
- 1/3 cup heavy cream
- 2 teaspoons pure vanilla extract
- 1/4 teaspoon kosher salt
- 1 1/2 cups Lucky Charm marshmallows
- Green, black, and yellow food coloring, for decorating
Instructions
Let’s build this magnificent St. Patrick’s Day Cake!
Cake:
Step 1: Preheat and Prepare Pans
Preheat your oven to 350°F (175°C). Line one 8-inch cake pan and five 6-inch cake pans with parchment paper rounds. Coat the pans with cooking spray.
Step 2: Combine Dry Ingredients
In a large bowl, whisk together the flour, baking powder, and salt.
Step 3: Cream Butter and Sugar
In another large bowl, using a handheld mixer on medium-high speed (or a stand mixer fitted with the paddle attachment), beat the granulated sugar and softened butter until combined.
Add the oil and beat until the mixture is smooth and creamy.
Step 4: Add Eggs and Vanilla
Add the eggs one at a time, beating well after each addition. Then, beat in the vanilla extract.
Step 5: Alternate Adding Dry Ingredients and Liquids
Add about one-third of the dry ingredients to the wet ingredients and beat on medium-low speed until just a few dry streaks remain.
Add the milk and beat until incorporated.
Add another one-third of the dry ingredients and beat on medium-low speed until just a few dry streaks remain.
Add the sour cream and beat until incorporated.
Add the remaining dry ingredients and beat until just combined. Be careful not to overmix.
Step 6: Divide and Color Batter
Divide the batter evenly among six bowls.
Dye one bowl of batter red, one orange, one yellow, one green, one blue, and one purple, using gel food coloring for the most vibrant colors.
Step 7: Bake the Cakes
Pour the purple batter into the prepared 8-inch cake pan. Bake for 15 to 18 minutes, or until a tester inserted into the center comes out clean. Let cool completely.
Pour the remaining batters (red, orange, yellow, green, blue) into the prepared 6-inch cake pans. Bake for 30 to 35 minutes, or until a tester inserted into the center comes out clean. Let cool completely.
Step 8: Make Ahead (Optional)
Cake layers can be baked 1 day ahead. Wrap them tightly in plastic wrap and refrigerate, or freeze for up to 2 weeks.
Frosting & Assembly:
Step 1: Make the Frosting
In a large bowl, using a handheld mixer on medium speed (or a stand mixer fitted with the paddle attachment), beat the powdered sugar and softened butter until smooth.
Add the heavy cream, vanilla extract, and salt and beat until combined and fluffy.
Step 2: Trim and Cut Cake Layers
Trim the tops of the cooled cake layers as needed to make them level.
Using a 3-inch round cookie cutter, cut out the center of the orange, yellow, green, and blue cake layers. Reserve the cut-out centers for another use (cake pops, perhaps!).
Step 3: Assemble the Cake
Place the purple layer on a cake stand or platter. Frost the top with a thin layer of buttercream.
Top with the blue cake layer. Frost with more buttercream and repeat with the green, yellow, and orange cake layers in that order, frosting the top of the orange layer with buttercream.
Pour the Lucky Charms marshmallows into the center of the cake, filling the hole created by the cookie cutter.
Top with the red cake layer.
Step 4: Crumb Coat
Frost the top and outside of the cake with a thin layer of buttercream to create a crumb coat. This will seal in any loose crumbs and create a smooth surface for the final frosting.
Refrigerate the cake until the crumb coat is well chilled, at least 30 minutes or up to 2 hours.
Step 5: Final Frosting and Decoration
Scoop out about 1 1/2 cups of the buttercream and set aside.
Dye the remaining buttercream green using gel food coloring.
Using an offset spatula, frost the cake with the green buttercream, smoothing the sides with a bench scraper.
Step 6: Create the Hat Details
Divide the reserved buttercream into two portions: about 1 cup and 1/2 cup.
Dye the 1 cup portion black and the 1/2 cup portion yellow.
Using an offset spatula, frost a 1-inch-thick belt with the black frosting at the base of the cake, just above where the “rim” of the hat would be. To help create a smooth line, you can wrap the cake in parchment paper above where you’ll frost, covering the “rim” of the hat with parchment as well.
Transfer the yellow buttercream to a piping bag fitted with a medium round tip. Pipe a buckle over the black belt.
Recipe Summary and Q&A
Let’s recap the recipe and answer some frequently asked questions:
Recipe Summary:
We created a stunning St. Patrick’s Day Cake by baking six different colored cake layers, cutting out the centers of some, assembling them with buttercream frosting, filling the center with Lucky Charms marshmallows, and decorating the cake to resemble a leprechaun’s hat.
Q&A:
Q: Can I make this cake ahead of time?
A: Yes! You can bake the cake layers a day or two in advance and store them, wrapped tightly in plastic wrap, at room temperature or in the refrigerator. You can also make the frosting ahead of time and store it in the refrigerator. Assemble and decorate the cake closer to serving time.
Q: Can I freeze this cake?
A: You can freeze the unfrosted cake layers for up to 2 months. Wrap them tightly in plastic wrap and then place them in a freezer-safe bag or container. Thaw them at room temperature before frosting and assembling.
Q: I don’t have all the different sized cake pans. Can I use just one size?
A: You could, but you’ll need to adjust the baking time and the assembly process. You won’t be able to create the same layered rainbow effect with a single cake pan size.
Q: Can I use store-bought frosting?
A: You can, but the homemade buttercream frosting is really what makes this cake special. It’s worth the extra effort.
Q: My frosting is too runny. What can I do?
A: Make sure your butter is softened but not melted. You can also try refrigerating the frosting for a bit to firm it up, or adding a bit more powdered sugar, a tablespoon at a time.